
These elegant fabric flowers are very simple to make . . . and only take a few basic supplies. The finished product is delightfully lovely, and at times can look like a real flower! Every flower will turn out differently and that is part of the beauty!
If you haven’t used those tea lights in a while, now’s the time! I hope you enjoy making these as much as we do . . . below are instructions with pictures on how to make your own.
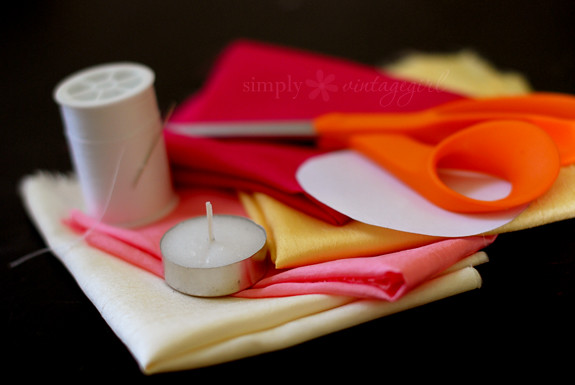
Supplies:
· Synthetic Silky Fabric
· Scissors
· Candle (preferably a tea light)
Additional supplies:· Scissors
· Candle (preferably a tea light)
· Needle and Thread, Glue Dots or Glue Gun
· Buttons and/or Beads
Directions:· Buttons and/or Beads
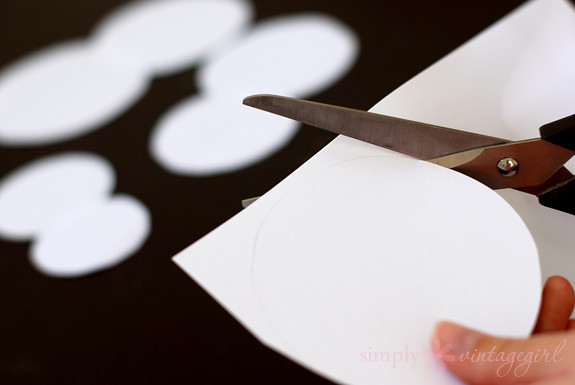
1. Cut circle patterns out of card stock.
Make the largest one’s diameter about half an inch larger than you want the diameter of the flower, as the petals will end up shrinking a bit. Create a few of these, lessening the diameter bit by bit so that the end result has smaller petals in the center and larger ones around the outside. You can also use a pattern here, which works very nice!
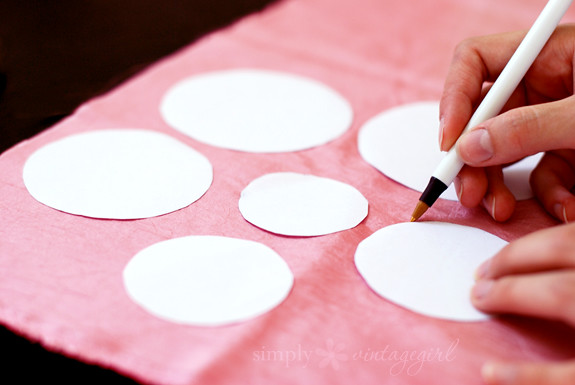
2. Trace around the pattern onto the silk fabric (using a pen).
You can also cut around the pattern and skip the drawing part, it just might not be as uniform . . . but with these, uniform isn’t necessary. And if it’s not uniform, it adds character. And character is good.
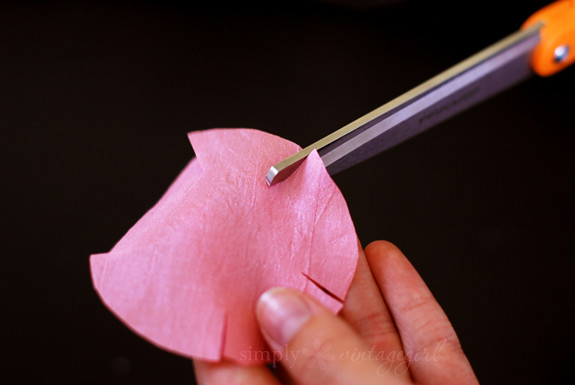
3. Take the scissors and cut out the circle and petals.
Cut just inside the drawn lines to make a circle out of the fabric. Carefully cut only about a third of the way into the circles to create the petals. You can do as many or few petals as you would like, or even add some variety to them. I cut five times, making five medium-sized petals. You can also round the corners of the petals, if you so desire.
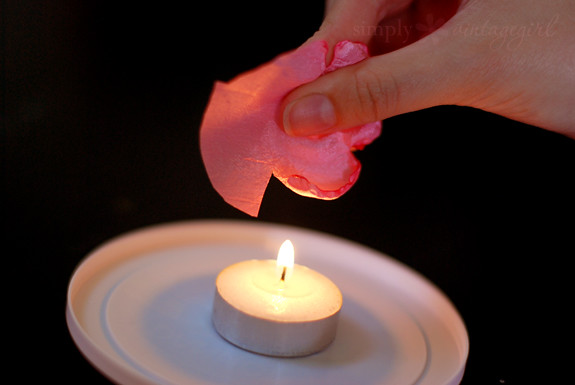
4. Use the lit candle to melt and crinkle the edges.
Be very careful (please have adult supervision, this is rather dangerous), as it is very easy to get burnt. Hold the cut petals about one to two inches above the flame, making sure to keep the circle rotating so that it does not overheat and catch fire. Continue to gently melt the edges of each petal until you have gone all the way around. Do this with each layer.
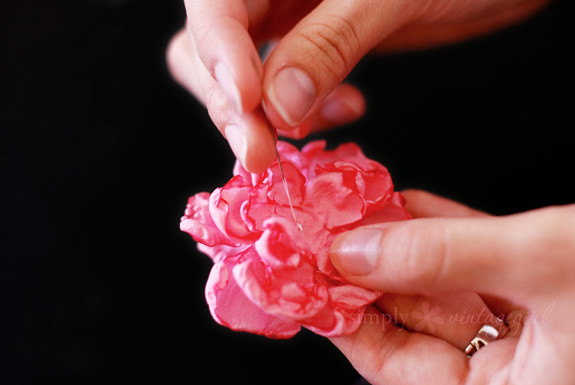
5. Sew (or glue) the petal layers together.
Using a needle and thread, create a beginning knot and then sew the layers together. You can come up through the top because the center of the top layer can be covered by a button or bead. To finish the flower, sew (or glue) the button or bead on top.
If you would like to add extra stability to the flower, you can sew or glue a piece of felt onto the back (make sure it is large enough to give good stability, but small enough so that it won’t be seen from the top).
For a hair accessory, you can sew or glue the back of the flower to the back of a bobby pin, ponytail holder, or snap-clip.For a broach, you can sew or glue them onto a broach pin or even a safety pin.
No comments:
Post a Comment